


I’m glad you’re reading this — ear care can be one of those things dogs tolerate much better if we come prepared, calm, and a little bit silly (but not too silly; ears are serious business).
## Gentle DIY Ear Cleaning For Dog Waxy Ears And Care
Dogs with floppy ears, active outdoor lives, or a genetic tendency for wax buildup often develop the classic “dog waxy ears” scenario. Waxy ears aren’t always an emergency, but they’re worth attention: buildup can trap dirt, moisture, and bacteria, and sometimes signals allergies or infections. This article covers what causes waxy ears, how to tell when it’s safe to treat at home, one veterinarian-approved DIY cleaning solution, and practical tips to keep the whole process gentle and stress-free.
### Why Ears Get Waxy
Ear wax (cerumen) is normal and protective. It traps debris, repels some microbes, and keeps the canal from drying out. But several things increase wax production or make wax harder to clear:
– Ear shape and hair: Floppy or hairy ears limit airflow.
– Moisture: Baths, swimming, or humid weather can encourage wax clumping.
– Allergies and skin conditions: These can produce more secretions.
– Foreign material or parasites: Grass seeds, mites, or dirt can change wax consistency.
Dogs with recurring waxy buildup are common; the challenge is distinguishing normal maintenance from the start of an infection.
### When Waxy Ears Need Professional Attention
Not every waxy ear needs a vet visit, but watch for these signs:
– Foul odor from the ear
– Redness, swelling, or heat around the ear
– Persistent head shaking, scratching, or pawing at the ear
– Brown, yellow, or bloody discharge
– Pain when you touch the ear or trouble hearing
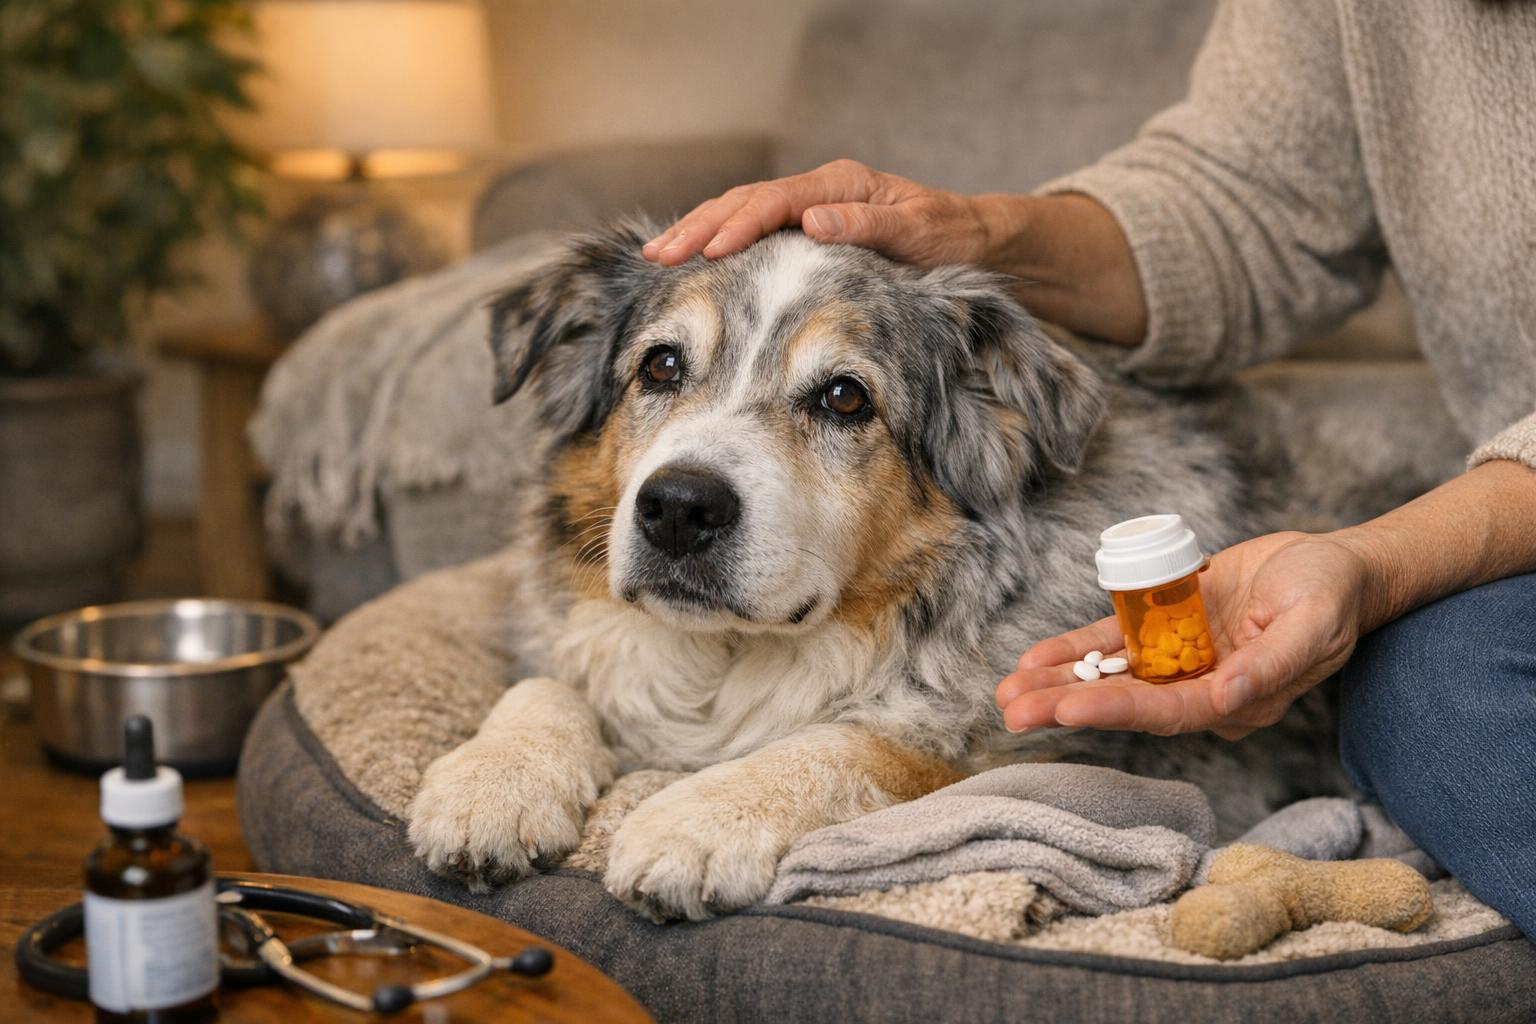
If any of those appear, or if your dog’s ear symptoms come back quickly after cleaning, see a veterinarian. Ear infections can escalate and may require prescription drops or systemic treatment.
## DIY Ear Cleaner Recipe And Method
Below is a simple, gentle ear cleaner that works well for routine maintenance of dog waxy ears. It’s designed to loosen wax and aid removal without stinging or damaging the canal. Use only on dogs without open wounds, severe redness, or signs of infection — if those are present, stop and consult your veterinarian.
Ingredients / Required Materials:
– 1/2 cup distilled water (sterile and mineral-free)
– 1/4 cup apple cider vinegar (ACV) or white vinegar (ACV is generally milder for skin but both work)
– 1/4 cup 70% isopropyl rubbing alcohol (optional — speeds drying; omit for very dry or irritated ears)
– 1 teaspoon mineral oil or olive oil (to soften wax)
– A clean dropper bottle or squeeze bottle
– Cotton balls or gauze pads (not cotton swabs)
– A towel and treats
– Optional: bulb syringe (for gentle flushing, only if recommended by your vet)
Step-by-Step Creation (Mixing):
1. Sanitize your workspace and wash hands thoroughly. Use gloves if you prefer.
2. Warm the distilled water slightly to lukewarm (test on the inside of your wrist). Do not use hot liquid.
3. In a clean container, combine the distilled water and vinegar. If using alcohol, add it now. Stir gently to mix; avoid vigorous agitation.
4. Add the teaspoon of mineral or olive oil and stir to blend. The oil helps soften firm wax. The final mixture will be slightly cloudy.
5. Pour the solution into a clean dropper or squeeze bottle and cap. Label the bottle with the mixing date. Use within one week; discard and remake if it smells off.
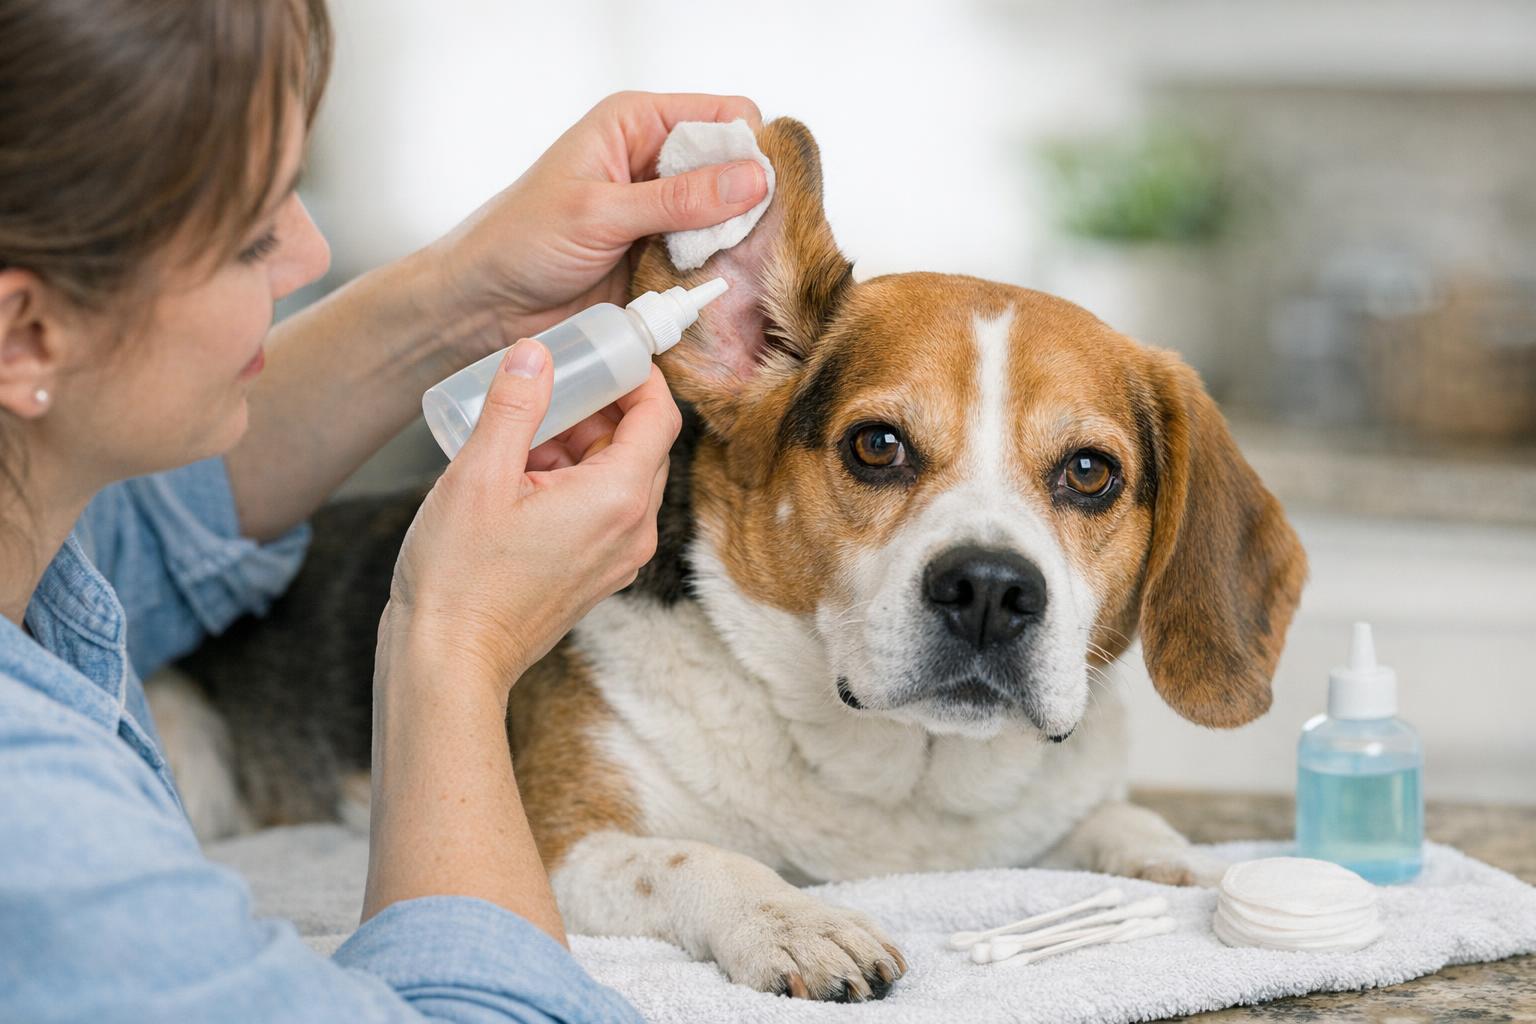
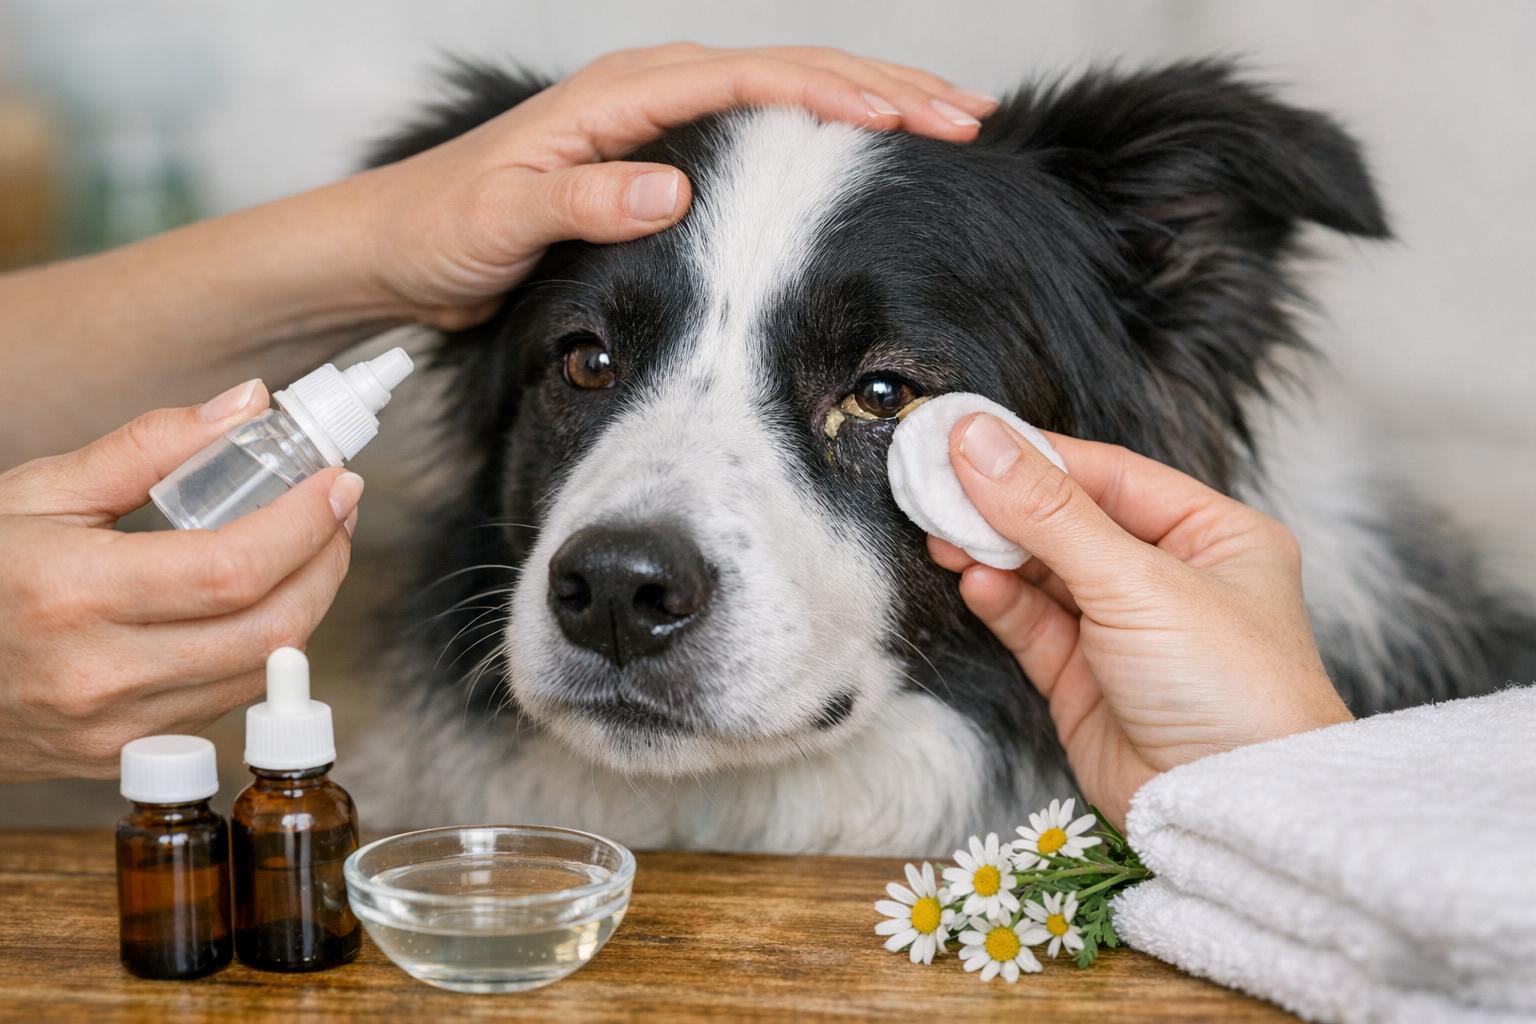
Step-by-Step Application (Professional Tone):
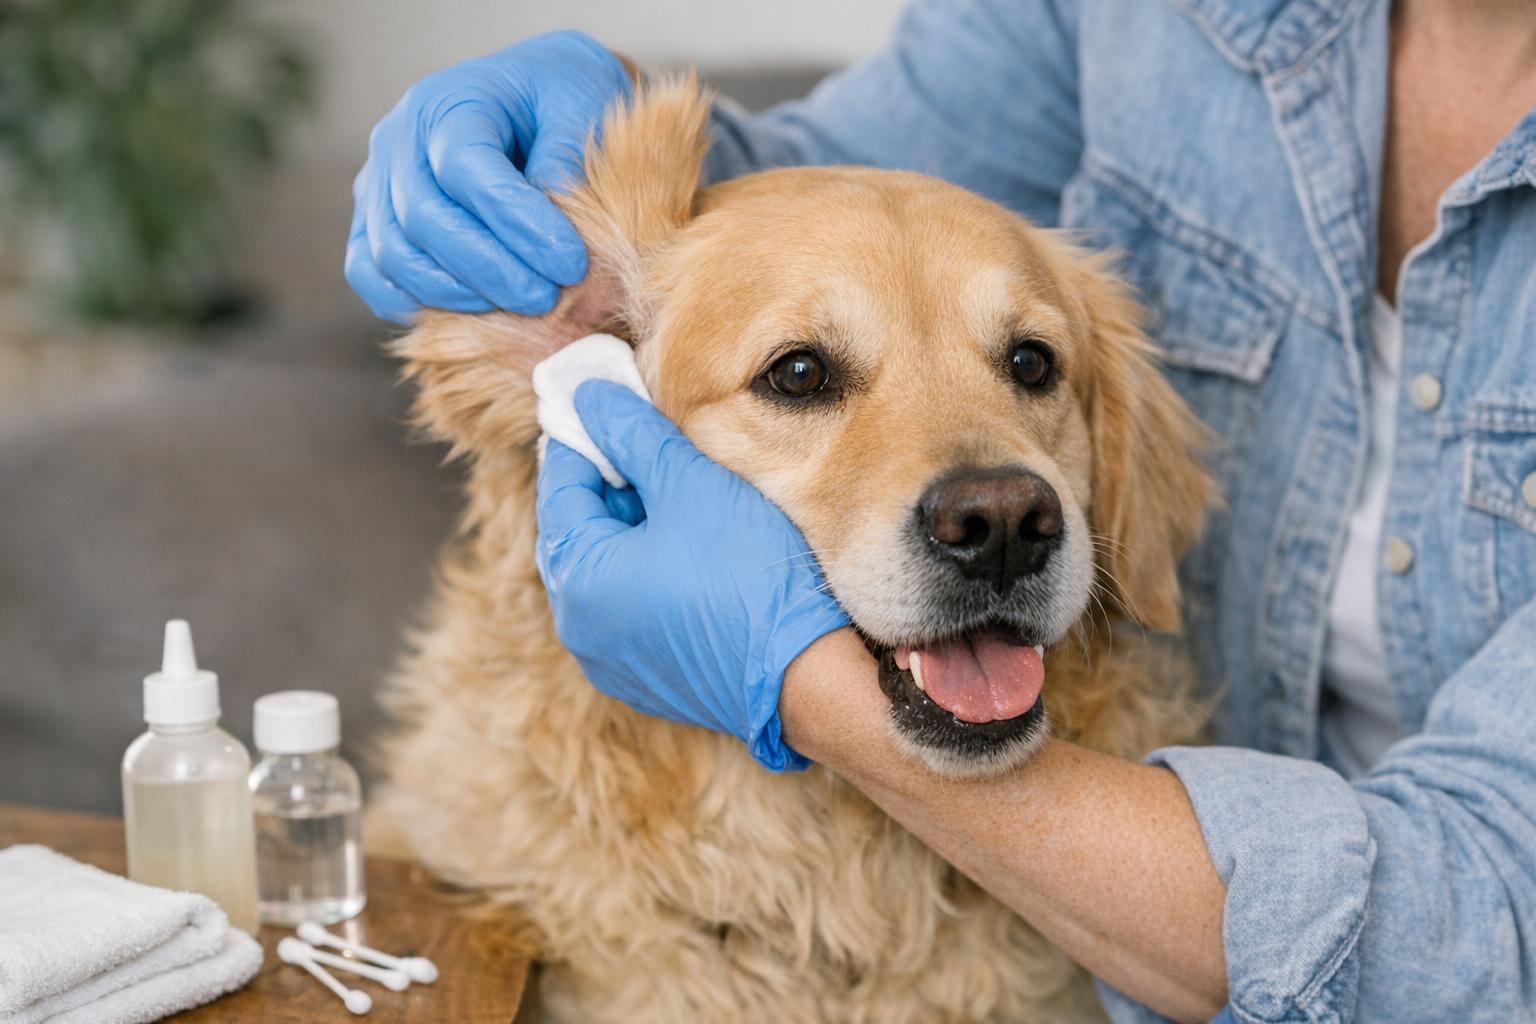
1. Calmly but firmly restrain your dog. Have a helper hold the dog if needed, or wrap smaller dogs in a towel with the head exposed.
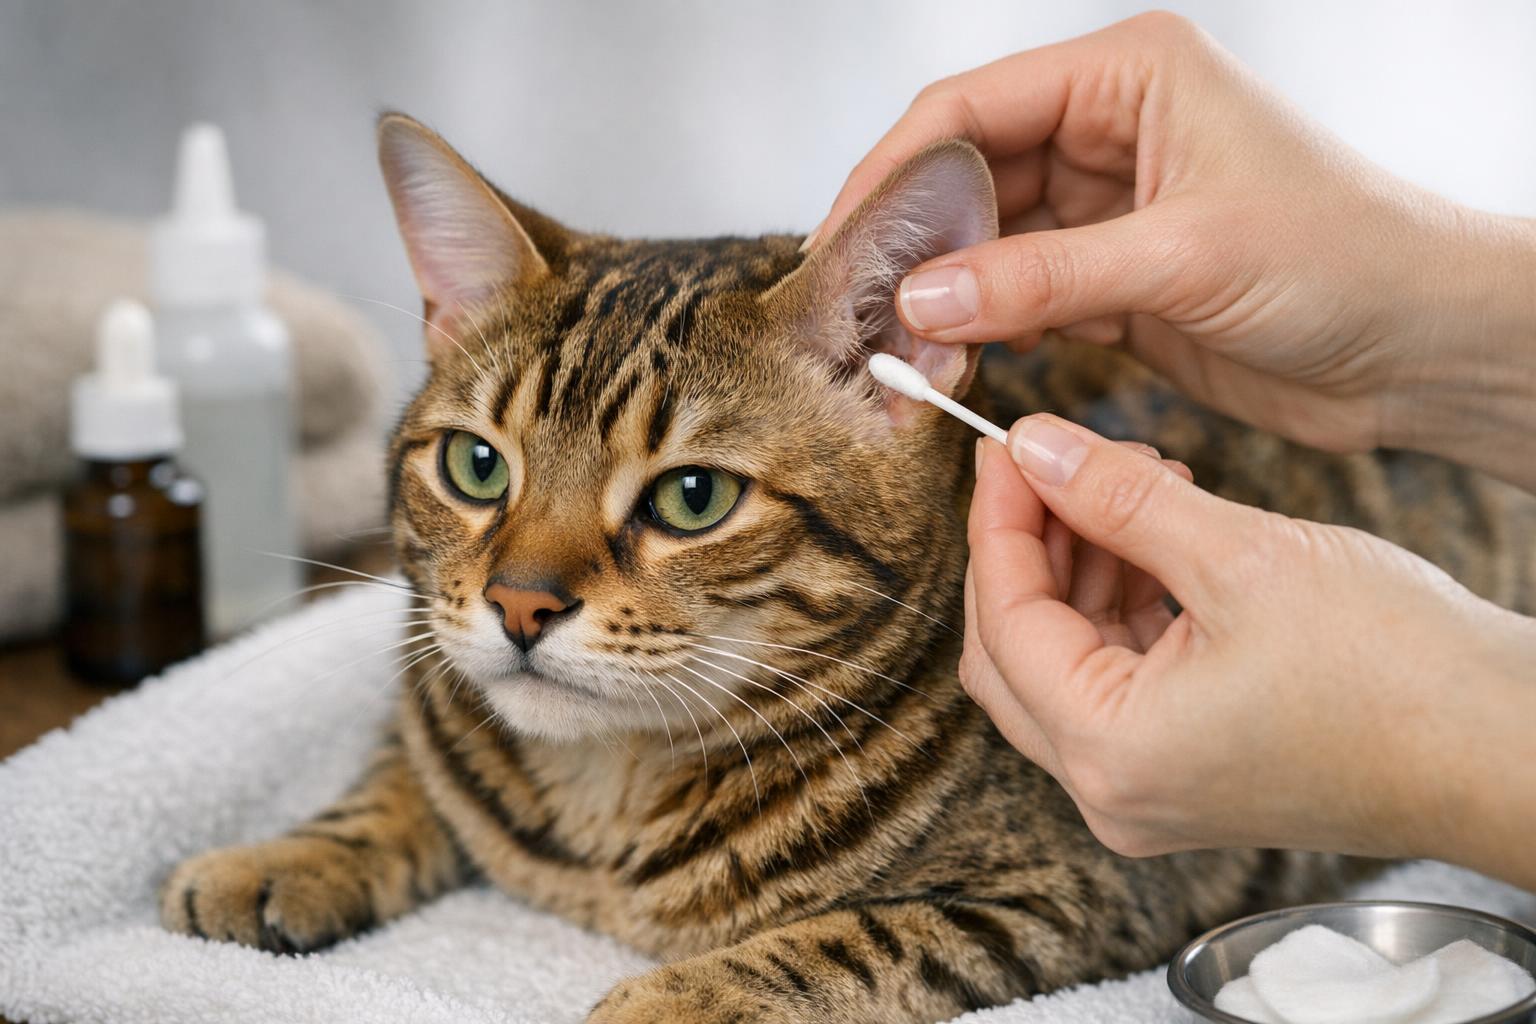
2. Gently lift the ear flap and inspect the canal entrance without inserting your finger deep into the ear. Look for redness, swelling, or discharge. If these are present, discontinue and seek veterinary care.
3. Warm the solution to body temperature by holding the bottle in your hands for a minute. Cold liquid can be uncomfortable.
4. Fill the dropper with the solution. Slowly instill 3–5 drops into the ear canal of small dogs; 5–10 drops for medium to large dogs. If the ear canal seems very full of debris, your veterinarian may advise more volume or a different technique.
5. Massage the base of the ear firmly for 20–30 seconds. You should hear squishing noises — this helps the solution break up wax and move debris out.
6. Allow your dog to shake its head into a towel. This is where most loosened wax will be expelled.
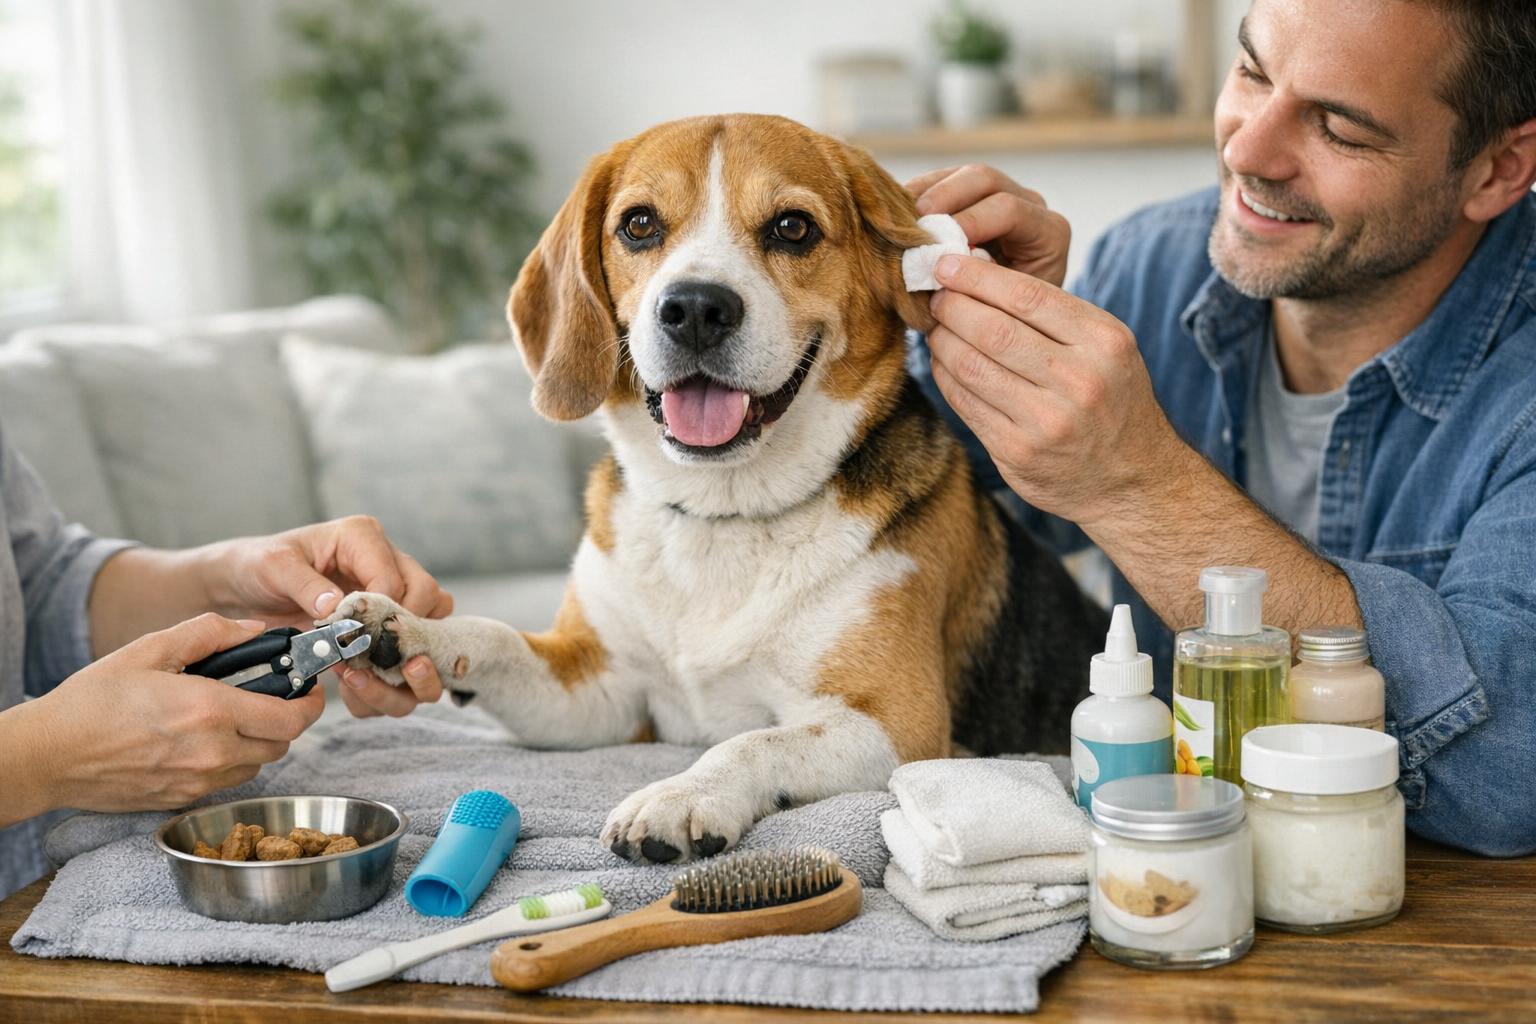
7. Gently wipe the visible portion of the ear and the entrance to the canal with a cotton ball or gauze. Do not insert cotton balls or swabs deep into the ear canal.
8. If necessary and advised by your vet, repeat once more. Do not over-clean; once every 1–2 weeks is often sufficient for routine maintenance, though some dogs need less frequent attention.
9. Reward your dog with praise and a treat for cooperative behavior. Regular positive reinforcement reduces stress in future cleanings.
Notes On Safety And Modifications:
– Omit the alcohol if your dog has very dry or irritated ears. Alcohol helps evaporate moisture but can sting if the skin is broken.
– If your dog resists strongly, stop and try in short sessions over several days to build tolerance.
– Never use hydrogen peroxide routinely; it can be irritating with repeated use.
– Do not use any homemade remedies if your dog has a ruptured eardrum history; consult your vet first.
### How Often To Clean Dog Waxy Ears
Frequency varies. For dogs prone to waxy ears, once every 1–2 weeks may be appropriate. Others only need checking and occasional spot cleaning. Over-cleaning can strip protective oils and may increase irritation or infection risk — treat frequency as a balance between hygiene and maintaining normal ear defenses.
### Signs Cleaning Is Helping — And When It’s Not
If cleaning reduces odor, wax volume, and your dog’s scratching, it’s working. If symptoms persist, worsen, or you notice increased redness, bleeding, or a bad smell, stop cleaning and consult your veterinarian. Some ear conditions require prescription medications, topical antimicrobials, or even professional flushing.
## Tips For A Calm, Cooperative Ear Session
Dogs pick up on your energy. Keep things low-key and positive:
– Practice handling ears briefly between bath times so your dog gets used to touch.
– Start with just lifting the ear and rewarding, then progress to the full routine across sessions.
– Use soothing tones and short training-style increments with treats.
– If your dog hates restraint, try having them lie across your lap or on a low table and keep sessions under five minutes.
#### How To Hold Your Dog For Safety And Comfort
Support the head and neck gently but securely. For small dogs, a towel wrap can make them feel snug. For medium to large dogs, kneel beside them and use your forearm to stabilize their shoulders while a helper holds the collar gently. Avoid forcing the head or neck into unnatural positions.
#### Equipment That Makes This Easier
A few inexpensive tools help:
– A clean dropper or squeeze bottle
– Soft gauze or cotton balls
– A towel to catch head shakes
– A little travel-sized treat pouch
Try to avoid cotton swabs. They tend to push wax deeper and can injure the ear canal.
### Common Questions About Dog Waxy Ears
Will ear cleaning hurt my dog?
When done correctly, it should cause minimal discomfort. If the ear is painful, stop and see a vet.
Can I use ear drops from the pharmacy?
Human ear drops are not designed for canine ears; some contain ingredients unsafe for dogs. Use the DIY recipe above or veterinarian-prescribed products.
Is ear hair removal necessary?
Some grooming stylists pluck excess ear hair, which can improve airflow. That should be done by a professional to reduce trauma and inflammation.
Why does my dog’s ear smell?
An unpleasant odor often signals bacterial or yeast overgrowth. If smell accompanies redness or discharge, get veterinary care.
If you try the recipe above and your dog’s ear condition improves, continue gentle maintenance. If not, professional evaluation is the safest next step — ears can be stubborn and deserve the pros when needed.


Leave a Reply