


## How To Clean A Canister Filter: Step-By-Step Guide
If your aquarium looks cloudy or the flow from the filter is weak, that usually means the canister needs attention. Learning how to clean a canister filter properly will save you time, keep your fish healthy, and prevent ammonia or nitrate spikes. This guide walks through the practical steps, explains what to keep and what to toss, and covers a few common screw-ups people make.
### Why Cleaning Matters And When To Do It
A canister filter lives off three jobs: mechanical, chemical, and biological filtration. Over time the mechanical media clogs, chemical media wears out, and biological media can collect detritus that reduces its effectiveness. Regular canister filter maintenance prevents those layers from turning into a toxic stew.
If your tank looks fine and flow is steady, you can stretch the time between full cleans. If flow slows, or you see cloudy water, smell, or frequent algae blooms, act faster. For most community freshwater tanks a basic rinse every 4–6 weeks, with a deeper servicing every 3–6 months, hits the sweet spot.
## Tools And Materials You’ll Need
### Essentials For A Safe Clean
– A bucket reserved for aquarium use only. Never reuse a household bucket.
– Old towels or absorbent rags to catch spills.
– A soft toothbrush or small brush for the impeller and housings.
– Aquarium-safe siphon or turkey baster for flushing parts.
– Replacement media (sponges, carbon, polishing pads) if needed.
– Rubber gloves if you prefer to keep hands dry.
### Optional Items That Make Life Easier
– A pre-cleaning siphon to remove larger debris from the substrate so you don’t overwhelm the filter when you restart it.
– Extra O-rings if your canister is older. Cheap rubber parts can fail.
– A small mirror or light to inspect the impeller chamber.
## A Practical Cleaning Sequence
Follow a logical order and you’ll avoid killing beneficial bacteria. The key principle: preserve biological media; clean mechanical media thoroughly; replace chemical media when spent.
### Step 1: Prepare The Tank
Turn off heaters, lights, and powerheads. Unplug the canister filter at the outlet, not at the unit. Leave the intake and output hoses connected to the tank so you don’t spill the entire canister and so you can keep some tank water for rinsing biological media. Place towels around the canister and set the bucket beneath any drain clamps or valves.
### Step 2: Shut Off Flow And Drain Water
Close the inlet and outlet valves if your unit has them, then open the drain or disconnect the hoses carefully so water flows into the bucket. If your model has a quick-drain you’ll avoid a huge mess. Collect a few liters of tank water and keep it aside — it’s useful for rinsing. You should never rinse biological media with tap water because chlorine and chloramines will kill the bacteria you need.
### Step 3: Open And Inspect
Open the canister and take note of how the baskets stack and where media sits. Take a photo with your phone if you’re unsure — it saves time on reassembly. Smell the media. A sour or rotten smell indicates anaerobic pockets and that the media may need replacing.
### Step 4: Remove And Rinse Mechanical Media
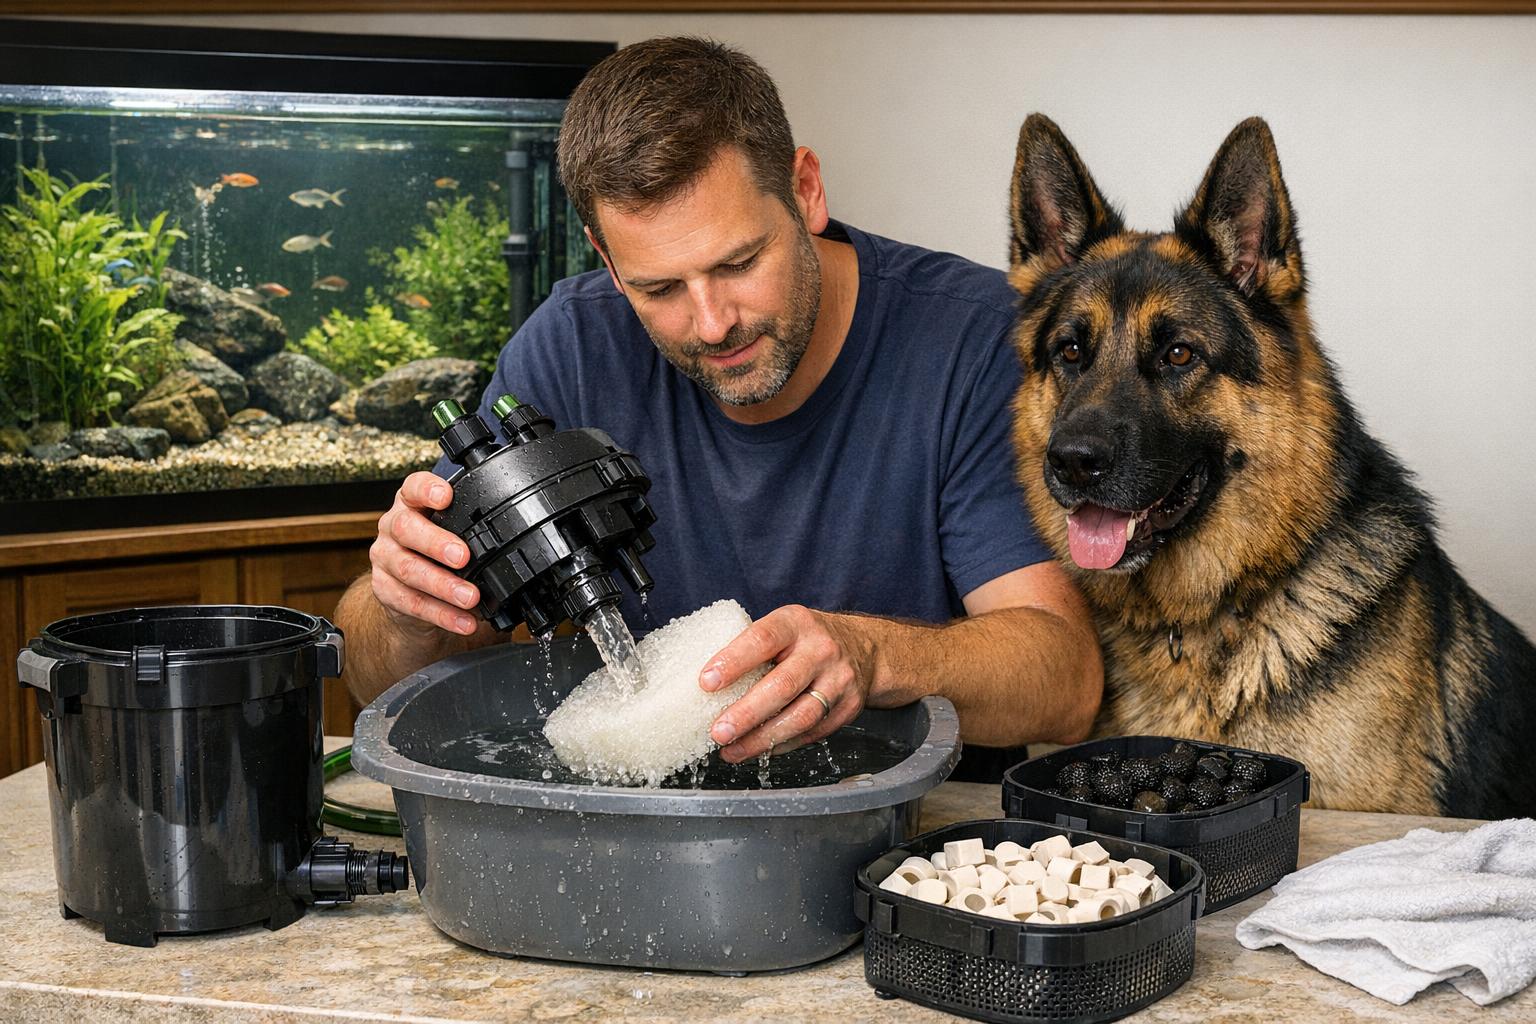
Mechanical sponges and floss capture the bulk of solids. Remove these first and rinse vigorously in the captured tank water until the water runs relatively clear. If the sponge is falling apart or has holes, replace it. Don’t over-clean mechanical media to the point of stripping all beneficial bacteria from its surface; a firm rinse is enough.
### Step 5: Handle Biological Media Carefully
Bio-rings, ceramic noodles, and porous blocks host the bacteria doing the heavy lifting. Rinse these gently in the same tank water. Don’t scrub them or use tap water. If they are crumbling or clogged irreversibly, replace a portion at a time rather than the whole lot. Swapping out 25–50% every few months keeps colonies stable.
### Step 6: Replace Chemical Media
Activated carbon, phosphate removers, and specialty resins should be replaced according to the product instructions. Carbon is usually good for 3–4 weeks in heavily planted tanks and up to 8 weeks in quieter systems. Always use fresh media packed in the recommended pads or bags to avoid fine grains escaping into the tank.
### Step 7: Clean The Impeller And Housing
Impellers are tiny, fast-spinning parts that often get gunked up. Remove the impeller carefully. Use a toothbrush to clean the shaft and the housing well. Keep a close eye for cracks or signs of wear. Lubricate any rubber O-rings with aquarium-safe silicone grease before reassembly to maintain a good seal.
### Step 8: Reassemble And Prime
Put the media baskets back in the same order. If you took a photo earlier that will make this quick. Close the canister, reattach hoses, and open the valves. Most modern canisters have a priming function or will self-prime when you reopen the valves slowly. Watch for leaks. If the unit won’t prime, check O-rings and valve positions.
## Common Mistakes And How To Avoid Them
People often ruin recoveries with one of a few predictable errors.
### Mistake: Using Tap Water On Biological Media
This is the most damaging mistake. Tap water treated with chlorine or chloramines kills nitrifying bacteria. Always rinse bio-media in tank water you set aside.
### Mistake: Over-Cleaning At Once
Deep cleaning all media at once removes too much bacteria, leading to ammonia spikes. Stagger replacements. Clean mechanical parts more often and biological parts less frequently.
### Mistake: Ignoring The Impeller
A clogged impeller equals poor flow. Clean it every time you service the canister and inspect for wobble or noise that suggests replacement.
### Mistake: Not Replacing Worn Parts
O-rings, clamps, and baskets wear. A leaking unit is often a result of a cheap rubber part that just needs swapping. Keep a spare set of seals for your model.
## How To Clean A Canister Filter Without Stressing The Tank
If your aquarium is sensitive or you’re dealing with a planted or reef setup, reduce the impact of cleaning by doing smaller, more frequent touch-ups rather than a single deep purge.
– Do a quick mechanical rinse every 2–4 weeks and leave biological media alone unless flow is compromised.
– When you replace chemical media, try doing it in stages so that all chemical-based adsorption isn’t reset at once, which could shift water chemistry.
– For shellfish or shrimp tanks, be extra cautious with carbon because it can remove trace elements they rely on.
## The Timeline: Maintenance Schedule That Actually Works
A realistic schedule beats idealistic one-size-fits-all rules.
– Weekly: Check flow, hoses, and look for leaks. Wipe down the exterior and clean any visible debris on strainers.
– Monthly: Rinse mechanical media, flush the intake strainer, and clean the impeller.
– Every 3 Months: Replace or recharge chemical media. Do a gentle rinse of bio-media if needed.
– Every 6–12 Months: Full service including inspection of O-rings, valves, and deep clean. Replace worn hoses and seals.
That timeline makes canister filter maintenance manageable. Adjust based on stocking levels, feeding, and tank type.
## Specific Notes For Different Aquarium Types
### Freshwater Planted Tanks
Planted tanks tend to be nutrient sinks but also produce fine particulates. Mechanical media can trap a lot of detritus. Rinse mechanical filters more often. Avoid too much activated carbon as it can strip trace elements beneficial to plants.
### Saltwater And Reef Tanks
Saltwater setups rely on stable chemistry. Replace chemical media carefully and never mix media types loosely — use proper media bags or cartridges. Rinse mechanical filters in tank water only. For reef tanks, you may want to stagger deep cleaning to avoid swings in nitrate and phosphate levels.
### Shrimp And Breeding Tanks
Shrimp are sensitive to water changes and the absence of biofilm. Keep biological media largely intact and do frequent small maintenance tasks. Avoid carbon unless you have a specific need, because it can remove amino acids and trace elements shrimp use.
## Troubleshooting Low Flow, Cloudiness, And Smells
If you followed the steps and still face problems, inspect these areas.
### Low Flow Persists
Check hose kinks and the impeller chamber. Hoses can get pinched or grow slimy inside. Clean them by running water from a garden hose or using a long bottlebrush. Replace aging tubing that has lost flexibility.
### Cloudy Water After A Clean
That usually means you disturbed biological media too much. Run a partial water change and add a biological booster if you use them. Monitor ammonia and nitrite closely. If levels spike, do smaller, more frequent water changes until bacteria recover.
### Rotten Egg Smell
A sulfur smell suggests anaerobic pockets from compacted media or excess detritus. Remove and inspect media; replace the worst pieces and increase circulation. Consider upgrading to media that resists clogging if you repeatedly see this issue.
## Upgrades And Long-Term Care
Aging canister filters can be revived with a few upgrades. Replace old tubing with thicker-walled, high-quality vinyl to reduce flexing. Install a pre-filter sponge on the intake to reduce the load on your main media. If your model allows, swap to modular baskets that make access easier.
Regular canister filter cleaning and canister filter maintenance are less about heroic deep cleans and more about steady daily care. Break the job into small, repeatable tasks and you’ll avoid big problems down the line.
#### When To Replace Media Versus Clean
Not all media are meant to last forever. Mechanical sponges often last a year depending on wear. Biological rings can function for years but may need partial replacement after heavy fouling. Chemical media like carbon is consumable and should be replaced per manufacturer directions.
#### Signs It’s Time For A New Filter
If you notice persistent flow loss after cleaning, frequent leaks, or parts that can’t seal properly anymore, it might be time for a new unit. Sometimes the cost and hassle of constant repairs exceed the price of a modern, more efficient filtre.
### Small Tricks That Make Servicing Easier
Label your media baskets with tape and marker so you don’t guess during reassembly. Keep a small notebook with service dates and what you changed. It helps track whether a particular media swap made a difference. Pretreat tap water with a dechlorinator if you accidentally need to use it for rinsing tools or the exterior parts, but again, never on bio-media.
### How To Clean A Canister Filter If You Only Have Tap Water
If you absolutely cannot keep tank water aside, use a dechlorinator that neutralizes chloramine and chlorine, and let the water sit to let any residual gas escape. This is not ideal for bio-media but it can be done in an emergency. Better to use a multi-stage approach: do mechanical cleaning now and schedule a biological rinse later using tank water.
## Canister Filter Maintenance For Busy People
Set a recurring calendar reminder for the key maintenance points. Keep a maintenance kit with spare O-rings, a toothbrush, and an extra sponge near the tank so it’s easier to act when the filter needs a quick touch-up. Doing a 10–15 minute check weekly prevents the two-hour deep cleans nobody likes.
## Products And Media Choices Without Hype
Skip the miracle claims and focus on the basics: good mechanical floss, reliable carbon if you need it, and porous ceramic or bio-balls for biofiltration. Use media bags where appropriate to keep fines out of the pump. If you use specialty chemical media, follow the manufacturer’s advised swap interval.
## Safety And Fish Stress Considerations
Always monitor water parameters after a significant clean. Small fish, fry, and inverts can pick up stress quickly. Lower lights during and after maintenance to reduce stress. If you have live plants, try to avoid massive shifts in nutrient-adsorbing media that may cause plants to react.
## When Professional Help Makes Sense
If you face recurring ammonia issues after cleaning or if your canister leaks despite new O-rings, a local aquarium tech can diagnose leaks and flow problems fast. They can also help match media to your tank’s bio-load and recommend a long-term maintenance plan that fits your schedule.
Keep in mind that consistent canister filter cleaning and canister filter maintenance pay off. The fewer shortcuts you take, the more stable your tank will be. A well-maintained canister is an unobtrusive, silent partner in your aquarium’s health, not a constant chore.
#### Quick Recap Of The Hard Rules
– Never rinse bio-media with untreated tap water.
– Clean the impeller every time.
– Replace chemical media on the schedule.
– Stagger deep cleans to preserve bacteria.
And if something feels wrong, stop. Check seals, hoses, and the priming system before you power the unit back up. Small precausions prevent big headaches.


Leave a Reply