





Turtles are slow to judge but quick to squirm if you mishandle them. Whether you’ve rescued a hatchling or adopted a seasoned slider, learning the basics makes life easier for both of you. Below are friendly, practical tips on safe, stress-free handling plus two proven home remedies for common minor issues. Read with a cup of tea (or turtle-approved greens) and remember: patience beats panic.
## Handling Basics: How To Handle A Turtle Safely
Turtles are built for water and sun, not for laps and sudden hugs. Knowing how to handle a turtle begins with understanding their anatomy and instincts. Their shell is not armor you should grab from the top; it’s a sensitive, living structure. Use slow movements and support their body firmly but gently. If you ever hear chattering or see flailing legs, that’s stress — give them more support and less talk.
### Recognize Stress Signals
Look for tucked-in limbs, rapid head withdrawal, hissing, or frantic paddling. These signs tell you the turtle is uncomfortable. Avoid forcing interaction; instead, back off and let them calm for a minute before trying again.
### Proper Grip And Support
How To Handle A Turtle well:
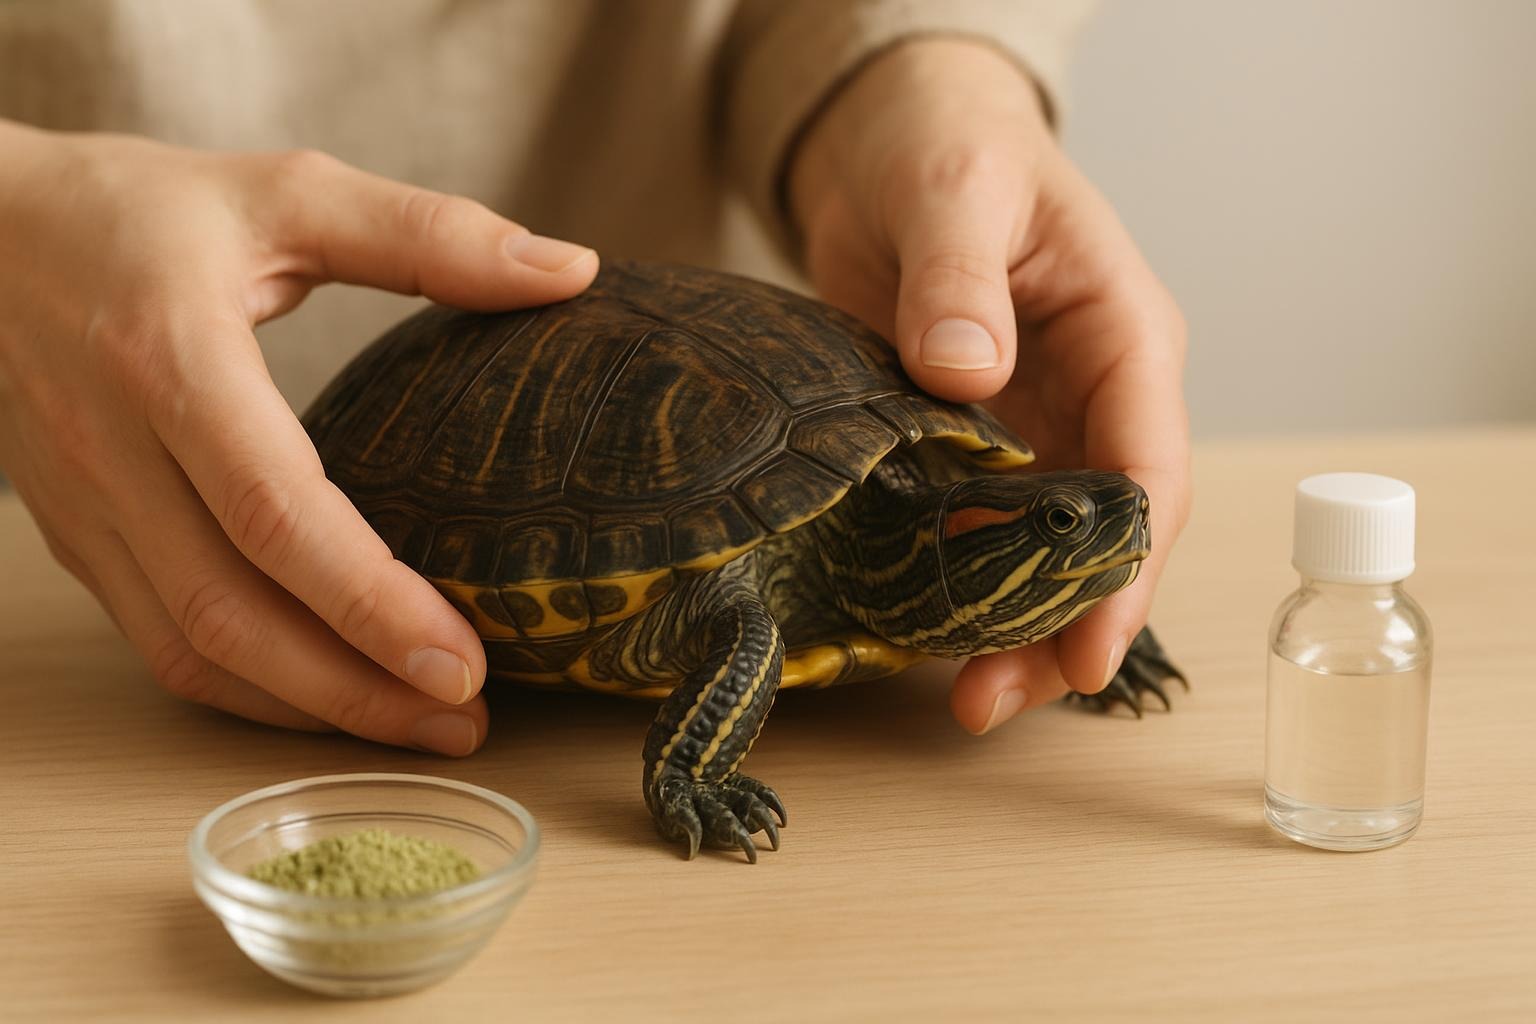
– Cup one hand under the plastron (the bottom shell) near the center and place your other hand across the carapace (top shell) or behind the rear legs for extra support.
– Keep the shell level; don’t tilt the turtle on its side or hold it vertically.
– Avoid grabbing by the tail — this can injure vertebrae and cause pain.
## Stepwise Handling: How To Handle A Turtle Without Stress
Breaking the approach into steps helps your turtle feel secure.
### Approach Calmly
Move slowly and talk softly if needed. Sudden shadows or hands can trigger reflexes.
### Lift With Two Hands
Slide your dominant hand under the plastron and your other hand over the carapace to stabilize. Lift smoothly and keep the turtle close to your body to reduce perceived falling risk.
### Short Handling Sessions
Keep initial handling sessions to a few minutes. Increase time gradually as the turtle shows comfort. Always supervise children and teach them the gentle lift technique.
#### Hygiene And Salmonella Precautions
Turtles can carry salmonella without symptoms. Always wash hands thoroughly with soap and water after handling. Wipe down surfaces the turtle contacted with a pet-safe disinfectant. Do not kiss your turtle or put it near your face.
## When To Avoid Handling
If your turtle is shedding scutes, basking, or appears ill (sunken eyes, lethargy, lack of appetite), avoid handling unless necessary. Stress can delay recovery. If you must transport for a vet visit, keep movements minimal, use a secure container, and maintain appropriate temperatures.
### Transport Tips
Use a padded, ventilated box or tub for short trips. Line the bottom with a towel to prevent slipping. For aquatic turtles, provide a damp towel rather than water to reduce sloshing unless the trip is extremely short and temperature-controlled.
## Remedy 1: Gentle Soak For Shell Cleaning
This remedy is for mild algae, dirt buildup, and to check the shell for small scrapes. It is not a treatment for shell rot or serious injuries — those need veterinary care.
Ingredients / Materials:
– Clean basin or shallow tub
– Lukewarm dechlorinated water (about 78–82°F / 25–28°C for most species)
– Soft toothbrush or sponge (reserved only for turtle care)
– Towel
– Optional: Reptile-safe antiseptic (chlorhexidine diluted per label) for tiny superficial spots (use only if advised)
Step-By-Step Creation And Application:
1. Prepare the Water: Fill the basin with enough lukewarm dechlorinated water to allow the turtle to sit comfortably with its shell partially submerged but head above water. Check temperature with a reliable thermometer.
2. Calm Placement: Gently place the turtle into the basin using the two-hand support method. Speak softly to reduce stress.
3. Soak Duration: Allow a gentle soak for 10–15 minutes. This loosens soft debris and softens algae without chilling the turtle.
4. Clean Gently: Using the soft toothbrush or sponge, very lightly scrub stubborn spots on the shell. Work in short, gentle strokes — do not force or scrape. If you encounter any soft, discolored, or foul-smelling areas, stop and consult a vet.
5. Rinse and Dry: Lift the turtle out with both hands, rinse briefly with clean dechlorinated water if needed, then pat dry with a towel. Make sure the turtle is completely dry before returning to a basking area.
6. Post-Soak Care: Place the turtle under its regular heat/basking lamp until fully alert and warm. Monitor for any unusual behavior over the next 24–48 hours.
Remedy Tone: Formal and careful. This is a hygiene procedure; observe veterinary avenues for anything beyond light dirt.
## Remedy 2: Epsom Salt Soak For Minor Swelling Or Soft-Tissue Soreness
This is a supportive, at-home soak to reduce mild swelling of limbs or to soothe minor soft-tissue injuries. It is not suitable for open wounds, deep punctures, or signs of systemic illness. Consult a reptile veterinarian for anything beyond mild, localized swelling.
Ingredients / Materials:
– Clean basin or tub
– Dechlorinated lukewarm water (temperature as above)
– Epsom salt (magnesium sulfate) — pharmaceutical grade
– Towel
– Timer
– Optional: Disposable gloves for handling
Step-By-Step Creation And Application:
1. Measure Water Volume: Fill the basin with enough water for the limb or body to be immersed comfortably. For aquatic species, a shallow soak is best; terrestrial species may require full-body soaking.
2. Dissolve Epsom Salt: Add Epsom salt at a ratio of approximately 1 tablespoon per liter (about 1 tbsp per quart). Stir until fully dissolved.
3. Test Temperature: Confirm water is lukewarm (78–82°F / 25–28°C). Temperature deviations can stress or harm the animal.
4. Soak Time: Gently place the turtle in the solution and soak for 10–15 minutes. Time to a safe interval — avoid prolonged soaking which can chill or over-hydrate the turtle’s skin.
5. Observe Continuously: Watch for signs of distress. If the turtle becomes lethargic, attempts to escape frantically, or shows labored breathing, end the soak and dry immediately.
6. Dry and Warm: Remove the turtle carefully, pat dry, and return to a warm basking area. Repeat once daily for up to three days. If swelling persists or worsens, stop treatment and seek veterinary attention.
Remedy Tone: Clinical and precise. Use gloves if you have cuts on your hands or to reduce cross-contamination.
## Feeding And Handling Etiquette
Do not handle a turtle right after feeding; allow digestion time to reduce regurgitation risk. Also, feed in a separate container if possible so the turtle associates hands with food less frequently — this reduces nipping tendencies. If your turtle nips, it’s usually exploratory, not aggressive. Avoid sudden retribution; instead, withdraw your hand slowly and resume only when calm.
### Handling With Children
Teach children to sit on the floor when holding a turtle and to follow the two-hand lift method. Supervise every interaction and enforce handwashing afterward. Make handling a short, structured activity with positive reinforcement.
## Routine Health Checks While Handling
Use gentle handling sessions to check for abnormalities: lumps, discharge from eyes or nose, soft or flaky scutes, and foul odors. If you detect any of these, note the specifics and contact a reptile vet. Minor issues can sometimes be managed at home, but many shell and systemic problems require professional care.
## When To Call The Vet
If the turtle has deep wounds, persistent swelling, discolored or soft shell areas, respiratory issues (wheezing, bubbles at nostrils), refusal to eat for more than a few days, or lethargy beyond normal post-handling rest, arrange veterinary attention promptly.
Keep in mind that mastering how to handle a turtle is equal parts knowledge and respect: respect their limits, know safe techniques, and have a couple of modest, evidence-based remedies at hand for the small stuff. Above all, prioritize cleanliness and professional guidance when in doubt — your shelled friend will thank you in its own slow, dignified way.















Leave a Reply